The Appointments scheduling tool allows you and your staff to set your availability and manage your schedules.
Your clients will be able to check your schedule and book their own appointments.
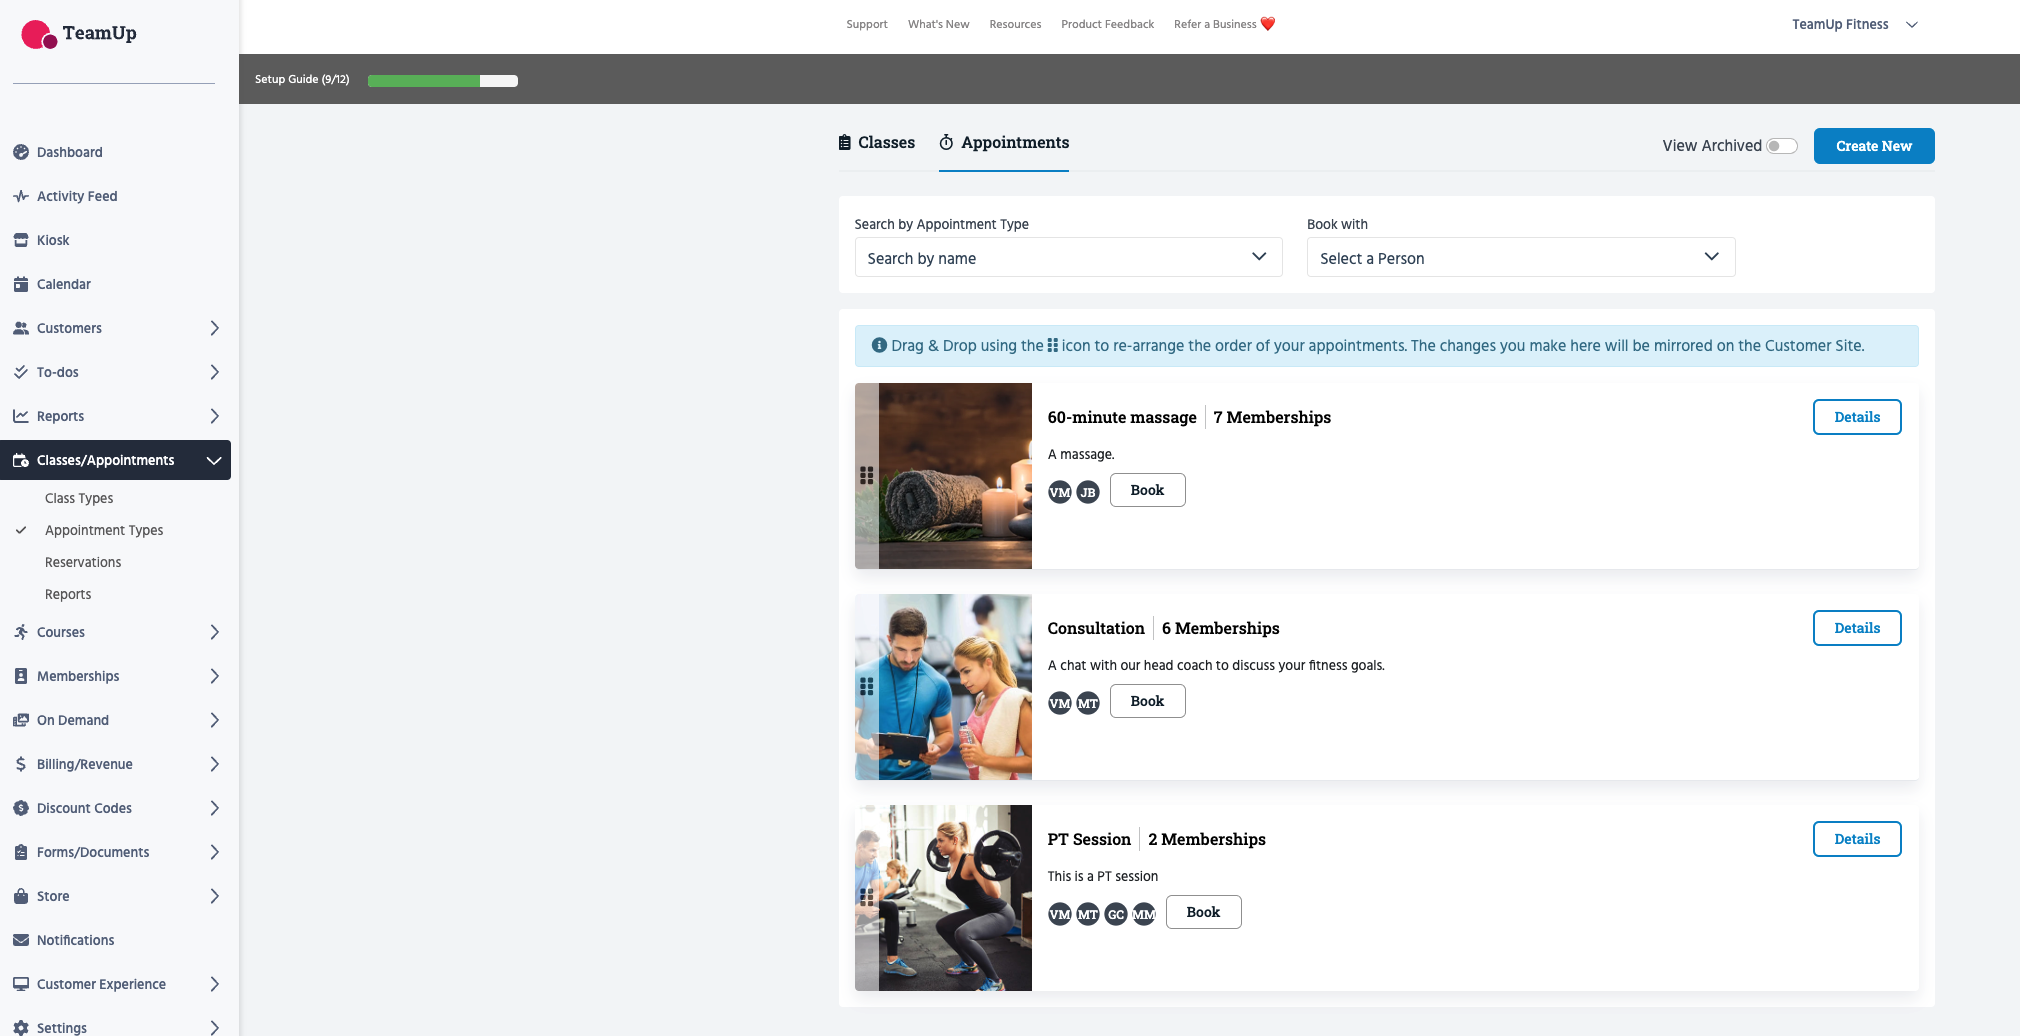
Appointments live under the Classes/Appointments section (see screenshot below). For more information on this section and whether to choose Classes or Appointments for your offerings, see An Overview of Classes/Appointments.
If you were using Classes to manage your one-on-one sessions/appointments (for example, to schedule your clients' private Personal Training sessions, book them in for consultations, etc.) and would like to transition to the Appointments feature, follow the steps below:
1. Remove the existing time slots from your one-on-one Class Type. If your Class Type didn't have pre-set time slots* (for example, repeating time slots, i.e., 9-10 am, 11-12 pm Monday, Wednesday, Friday), skip to step 2.
*Important! If you have clients on recurring reservations that attend the same time slot/s each week, we'd suggest keeping this Class Type and its time slots, instead of using Appointments. Appointments are better suited to clients that need to schedule their sessions ad-hoc.
If you want to keep your existing Classes for one-on-ones and use Appointments for ad-hoc bookings based on staff availability, skip this guide and head to How to set up an Appointment Type instead.
If you do need to remove time slots from your one-on-one Class Type, head to Classes/Appointments >> Class types and follow these steps to end them.
2. Archive the one-on-one class type. To do this, head to Classes/Appointments >> Class types and follow these steps to archive the class.
💡 If you had any packages or memberships linked to your one-on-one classes, these will automatically become unlinked from the Class Type when you archive it. In the next step, we'll take a look at how to create your Appointment Type/s and link them to new or existing one-on-one memberships/packages.
3. Create your new Appointment Types. In this step, you'll replace the Class Type/s you've just archived with Appointment Types. Just like Class Types, Appointment Types will allow you to enter details about what the session is about, but instead of linking pre-defined time slots to it, you will be able to link the Appointment Type to your staff's availability for appointments. To create an Appointment Type, see How to set up an Appointment Type.
4. Let your clients know that they can now book their appointments straight from the Customer Site!
We've put together this guide for your clients, outlining how to book appointments.
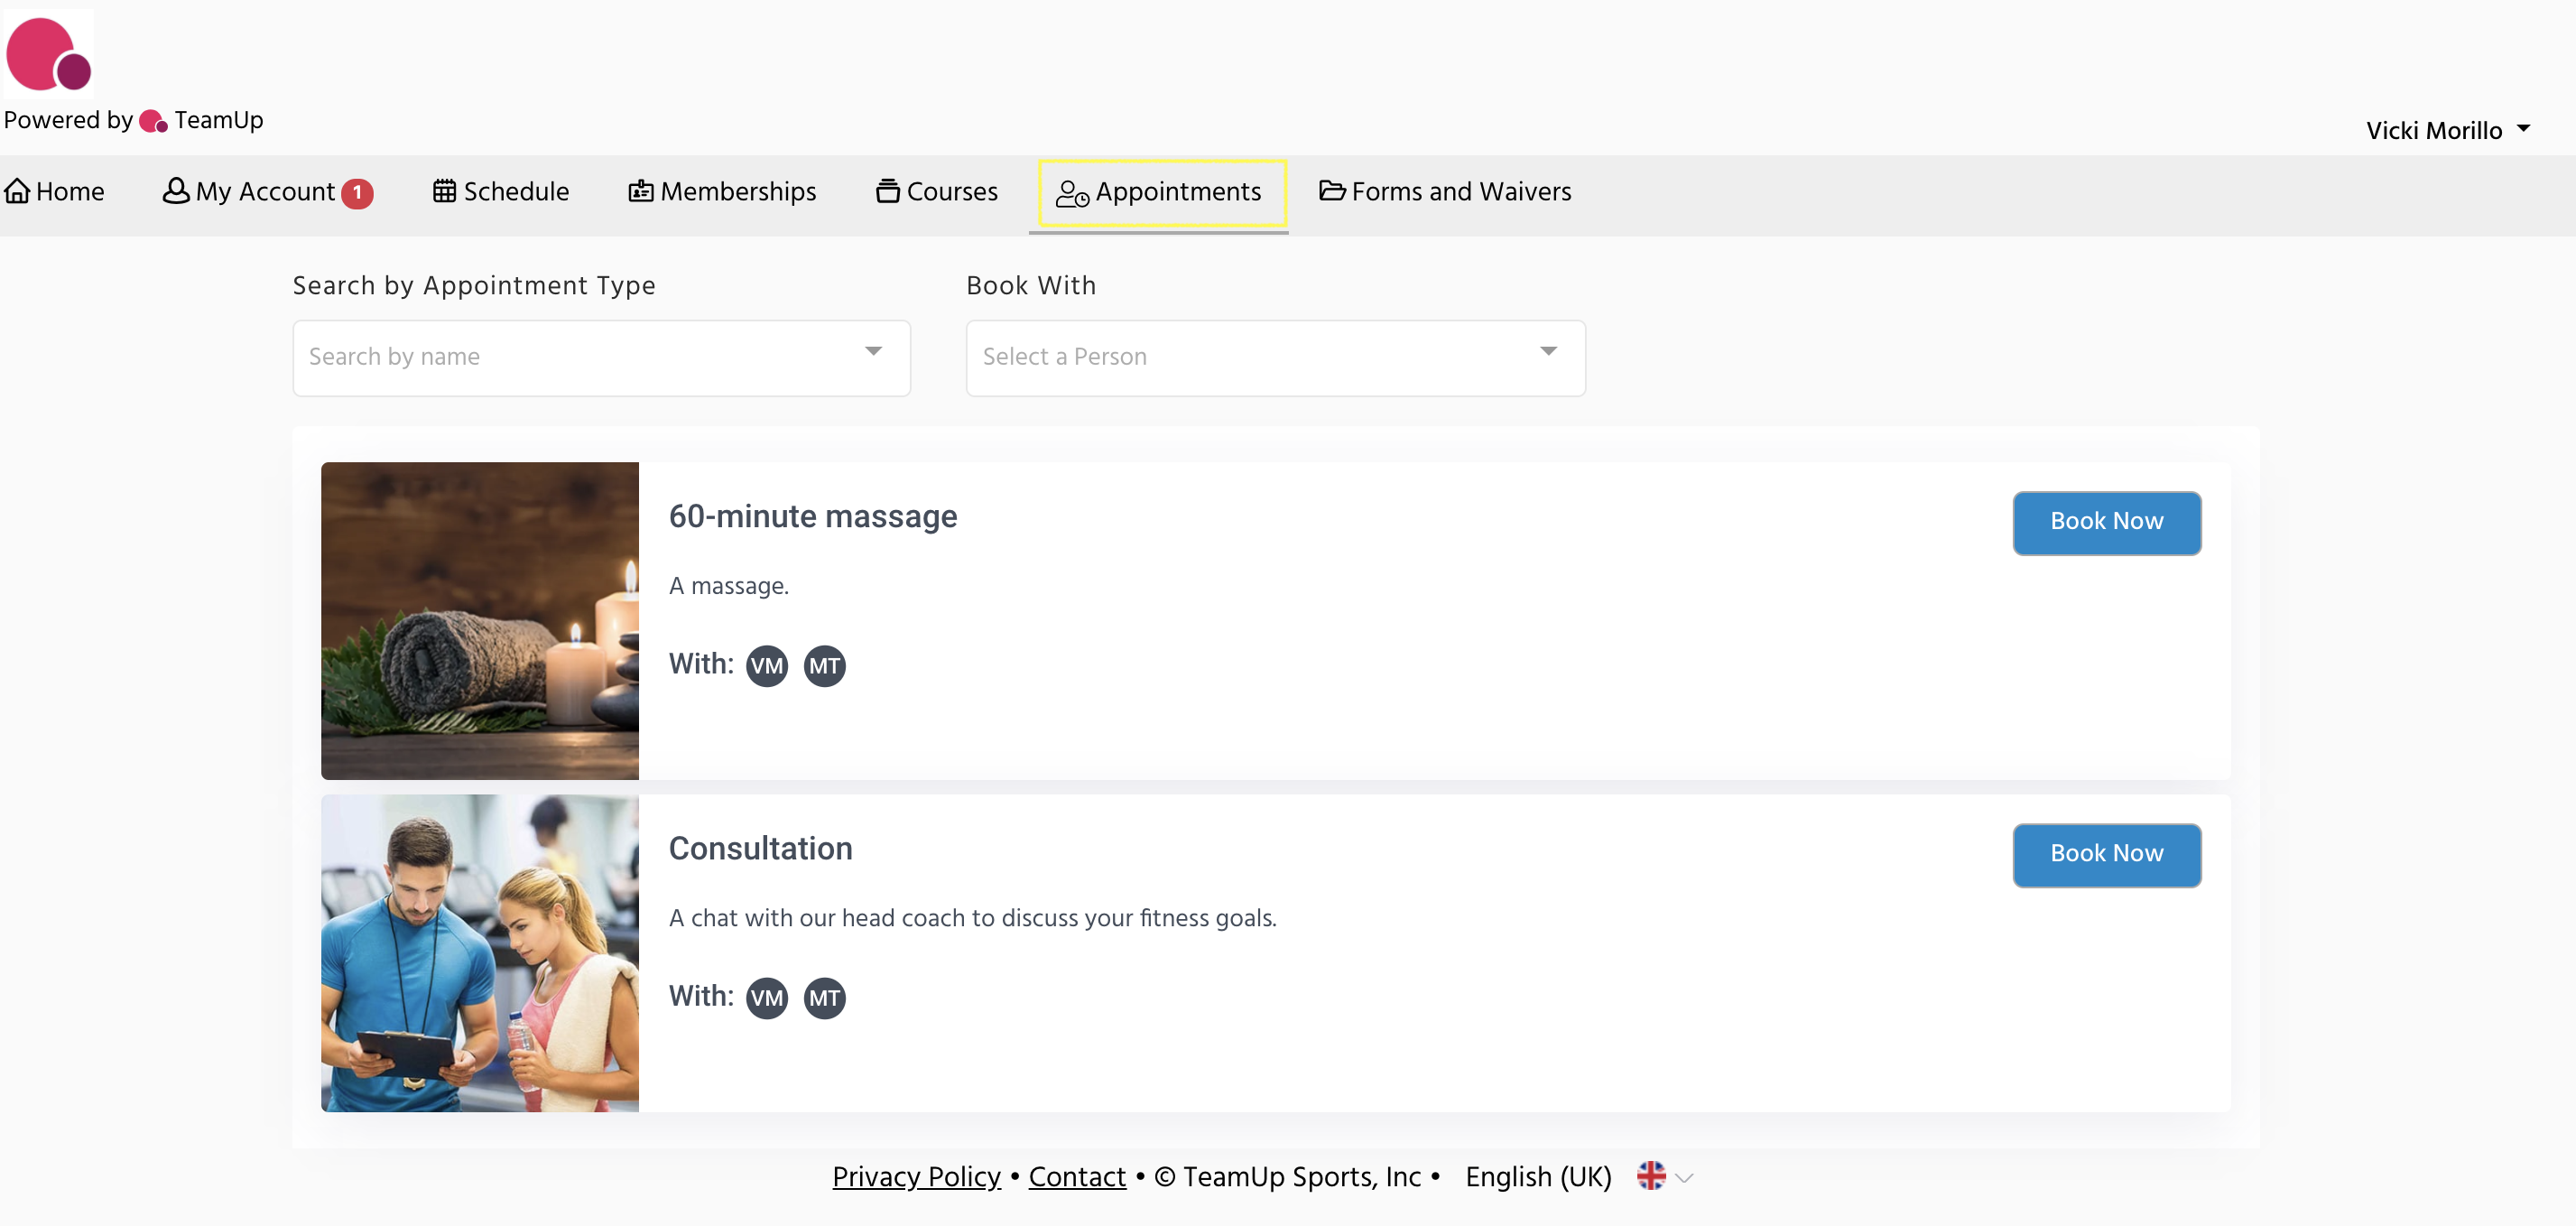
This is what your clients will see:
Jump to:
An Overview of Classes/Appointments
Recommended resources:
An essential guide to appointments: managing your personal training business with software