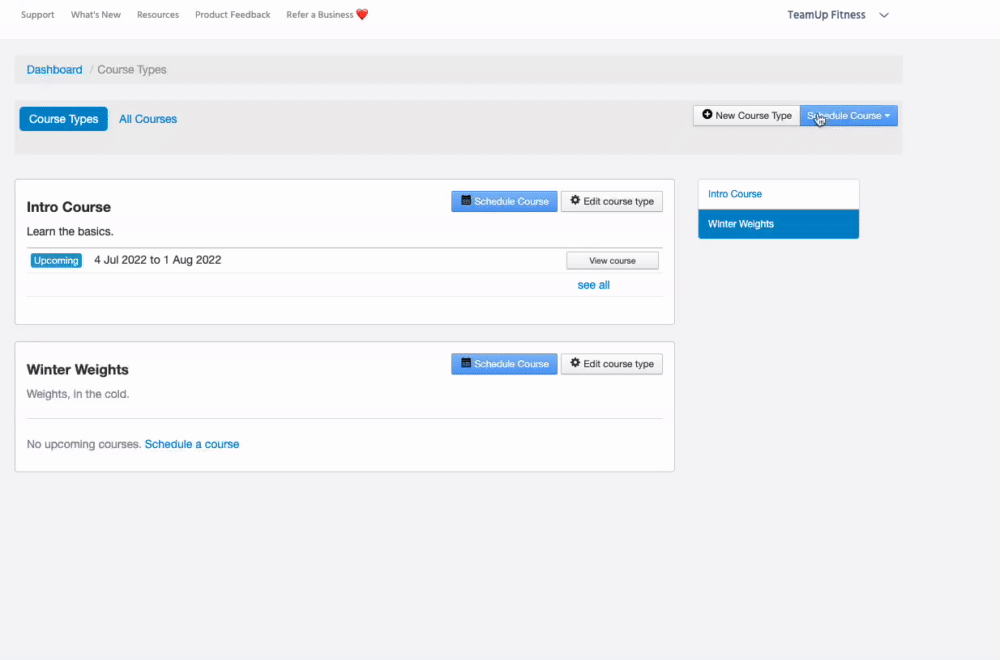
Overview of Courses
A Course Type creates a template that you can add new courses to as and when you need to. Use your course type template to add multiple courses under the same overall structure.
Each Course is a sequence of sessions. Your customers will attend all sessions within the sequence. You can allow drop-ins for individual sessions if you like.
Example: You have an On Ramp course that runs 6 days at the beginning of each month. Each course will have different dates from one month to the next and maybe a different instructor, but every course will belong to the On Ramp Course Type and have the same basic details.
In this guide we're going to take a look at how to create a Course Type:
🎥 Watch the tutorial
📕Read the tutorial
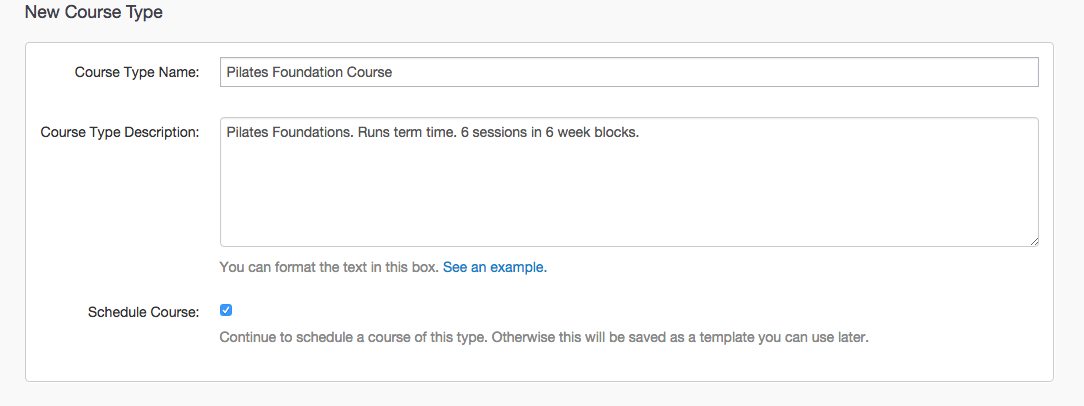
Head to Courses >> Course Types and click 'New Course Type' to add a new Course Type.
Here, add the name and description for your Course Type.
Do you want to add the schedule for this course now? If so, ensure 'Schedule course' is ticked.
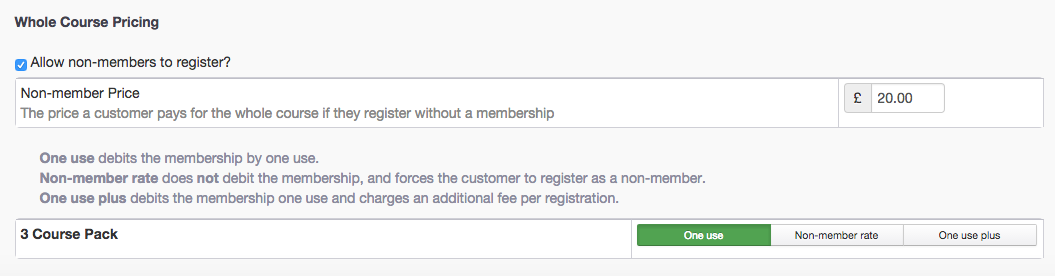
You'll be able to allow non-members i.e. customers without a membership, to register. You'll set the non-member price for the entire course at the same time.
You can also set the course prices for your existing memberships:
-
One-use will debit the customer's membership by one of the usage allowances. If you choose this option, ensure that the selected memberships allow course bookings. You can see this from Memberships >> Memberships >> click membership name >> click 'Edit' next to Usability >> the "Classes, Appointments, and Courses" should be selected.
-
The non-member rate will charge the customer the non-member rate.
-
One-use plus will debit the customer's membership by one usage allowance and charge them an additional fee set by you.
💡 The one-use plus price can also be used to give customers holding a membership a discount on the price. Just set the discount price here and ensure that the selected memberships allow course bookings. You can see this from Memberships >> Memberships >> click membership name >> click 'Edit' next to Usability >> the "Classes, Appointments, and Courses" should be selected.
Submit the page once you're happy with your settings.
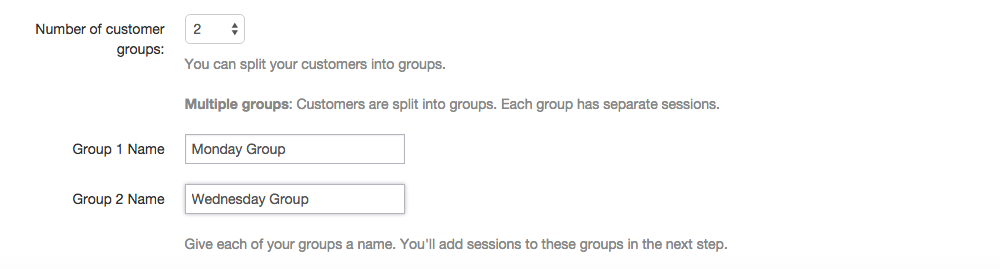
Now you'll be able to decide the number of customer groups for this Course Type.
Note: A group of customers will all take the course together. For example, you could have a Monday group of attendees each Monday for 6 weeks and a Wednesday group of attendees each Wednesday for 6 weeks.
Also, set your course size limit.
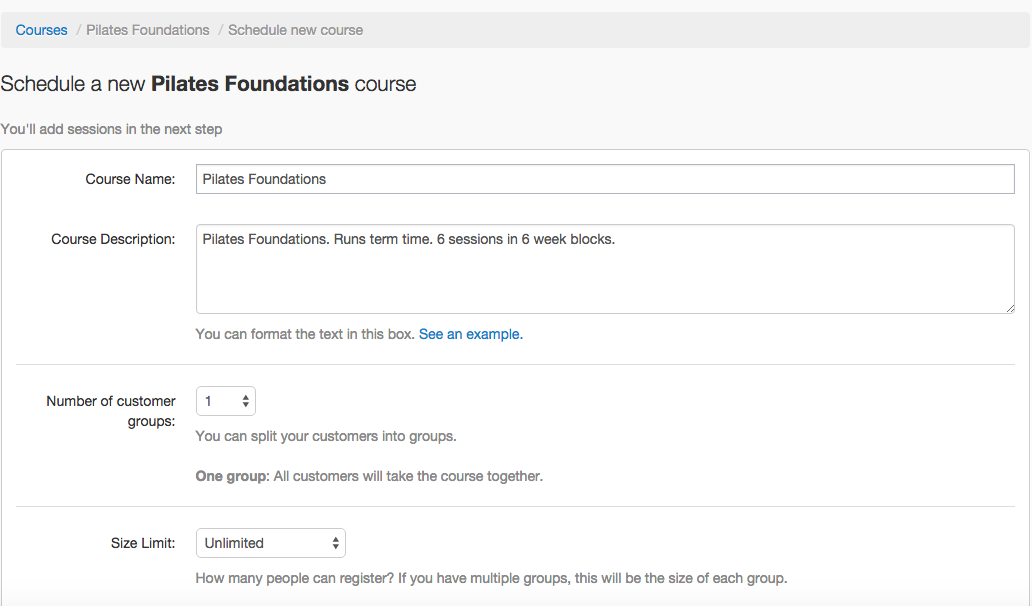
If you have multiple groups, you'll need to give each group a name.
You can allow customers to register for a course after they begin. If you choose this option, customers will still pay the full course price.
Note: If you add the customer to the course from the business side, you can override the pricing from the purchase form.
You can also allow single-session registrations for a set fee.
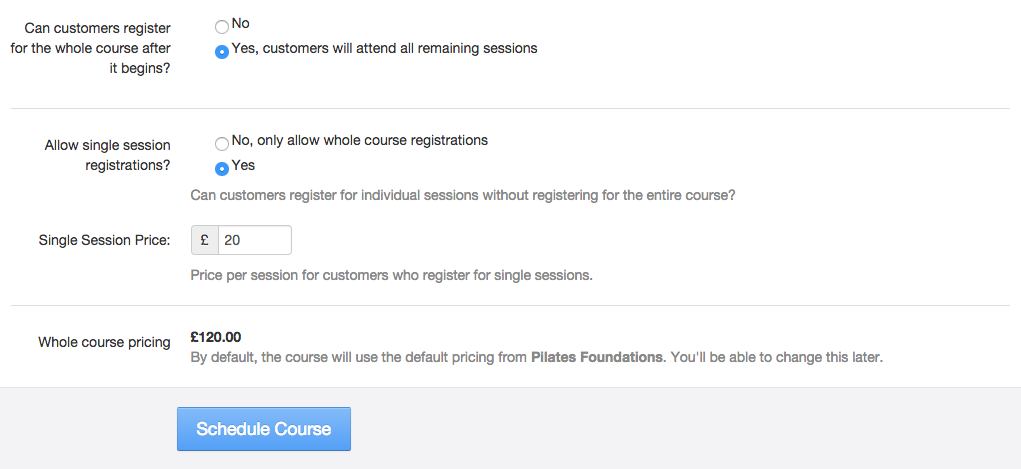
Once all settings are in place, you can schedule a course. For help with this, head to Scheduling a course.
💡Check that the 'Courses' tab is enabled from Customer Site >> Customise, to ensure your customers can see this tab.
Jump to: