Once your Course Type is in place, you can add your schedule. Let's take a look at how to do this!
🎥 Watch the tutorial
📕Read the tutorial
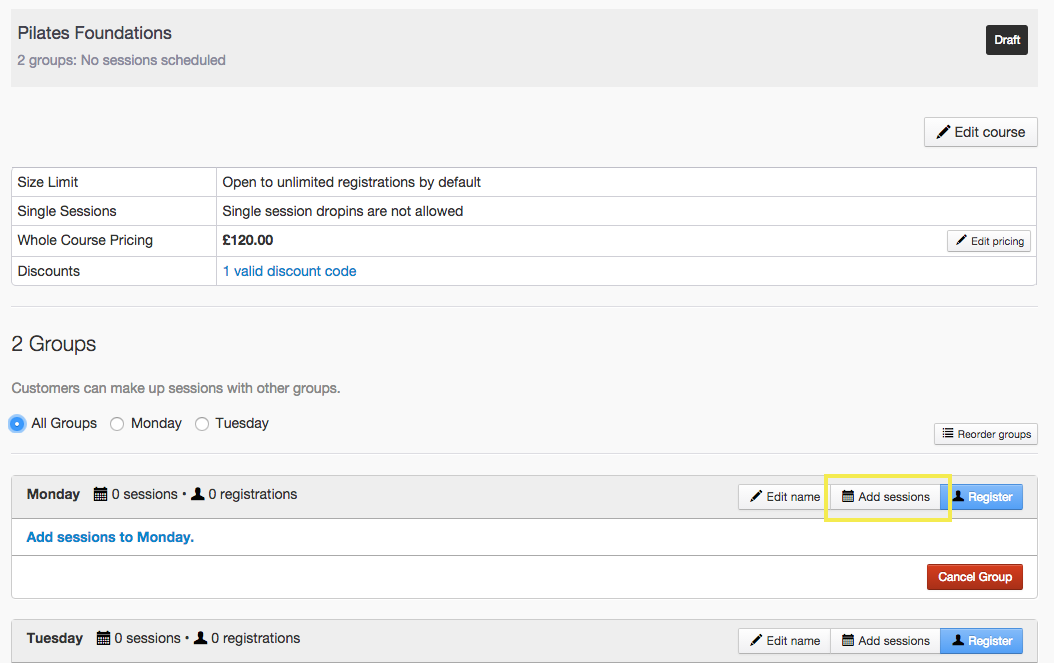
You can schedule your course immediately after creating the course type or from Courses >> Course types >> click 'Schedule a course'.
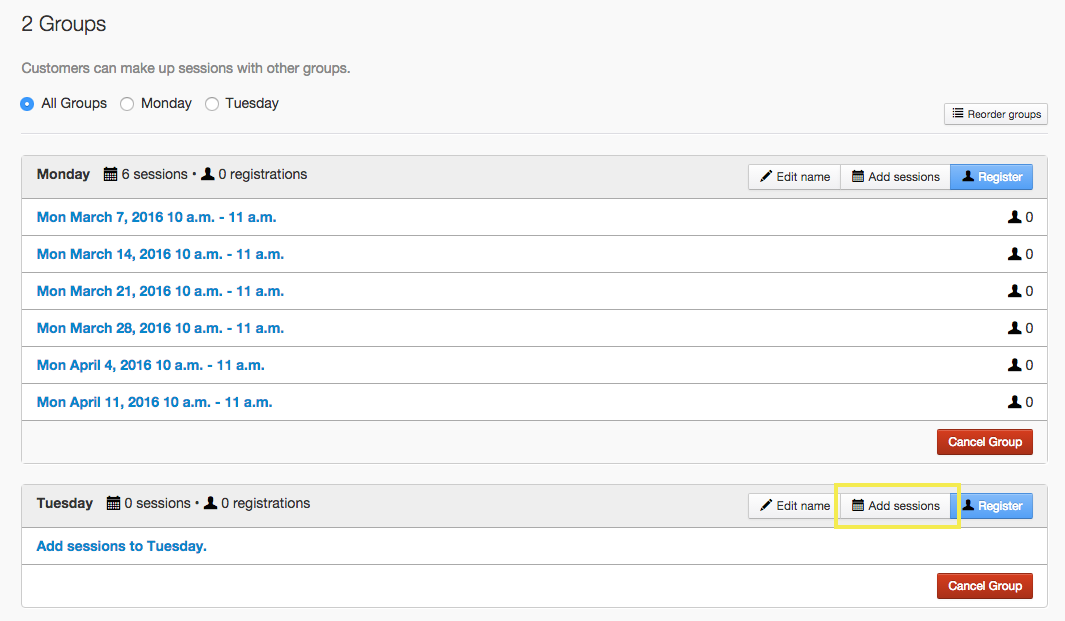
Let's start by adding sessions to our group. These will be the sessions that all registrations for this group will attend.
There are a few options to choose from when adding your course schedule:
-
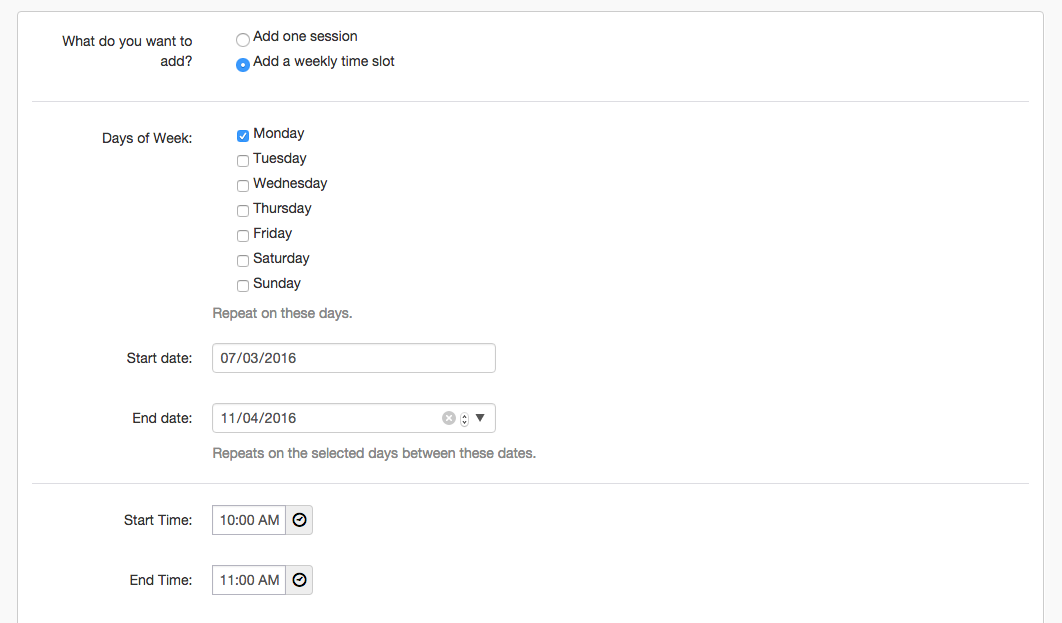
Do you want to add a one-off session to this group, or a weekly time slot?
-
Which days of the week should this schedule repeat on?
-
When do you want the schedule to begin and end?
-
Choose the venue and instructor for this schedule.
If desired, you can also create a separate course size limit for this schedule alone.
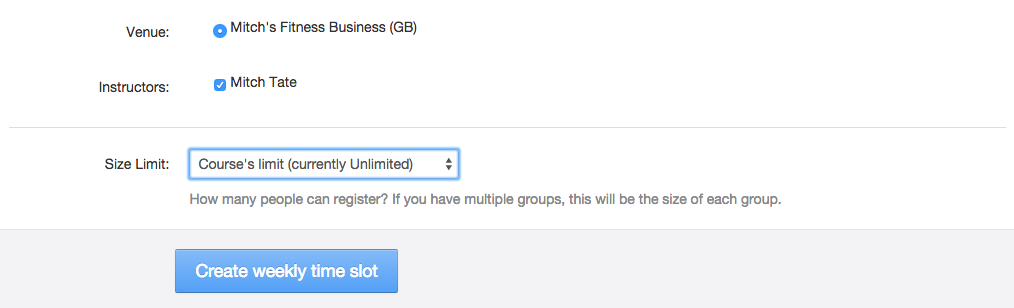
Click 'Create weekly time slot' to add the schedule to your course.
Now repeat the process for any other groups you have within this course.
Don't forget to publish your course once all your schedules are in place. This will ensure your customers can see the course from the calendar.

Need guidance managing registrations and attendances of your course? See Managing course registrations and attendances for more.
Jump to: