Does TeamUp integrate with Zoom? Using Zoom with TeamUp for online/video classes.
Below we'll run through the ins and outs of the Zoom Integration.
With our Zoom integration, you are now able to schedule your online Zoom classes directly from TeamUp.
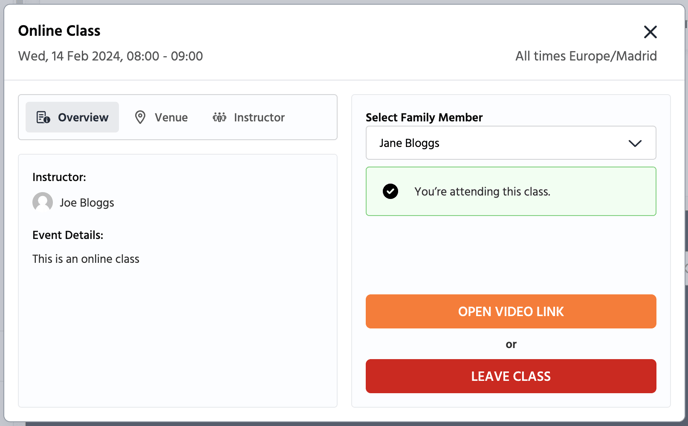
Class registrants will receive the link to the Zoom meeting in their registration confirmation email* in addition to being able to open the video stream from the class detail page on your Customer Site.
You can find and edit the template for the registration confirmation email under Notifications >> Class Registration >> Class: Registration Confirmation.
How does the integration work?
You can integrate TeamUp with Zoom in three easy steps:
1. Integrate your Zoom account
Head over to the Integrations page on your Business Dashboard (Settings >> Integrations).
Once there, click 'Get Started' in the Zoom section and then click 'Connect to Zoom'.
You will be redirected to Zoom where you can authorise TeamUp to manage the meetings for all the users on your Zoom account.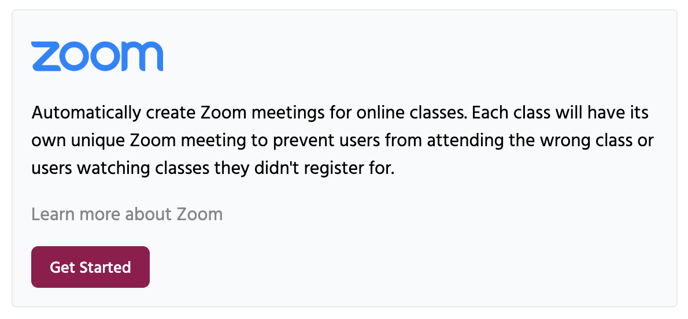
2. Create an online venue
An "online venue" is one where classes take place via video meeting. You are able to configure a venue to automatically schedule Zoom meetings for all classes taking place at that venue. Here's how to do that.
First, head to your Venue settings (Settings >> Venues/Rooms) and select 'Add a Venue' or edit an existing venue.
Then select 'Online venue where customers watch events' for the venue type.
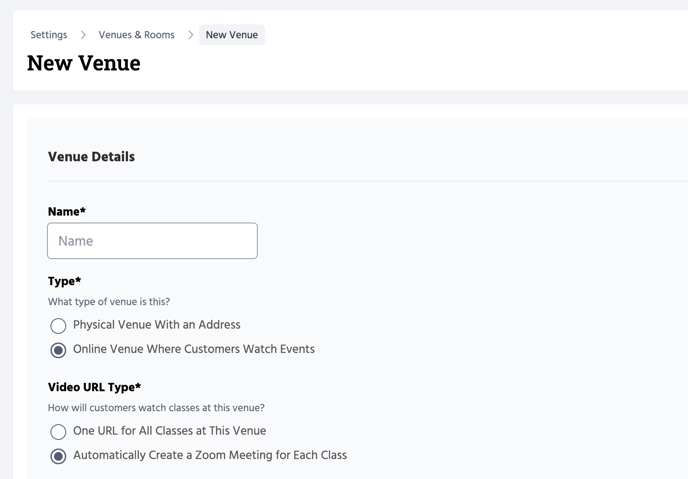
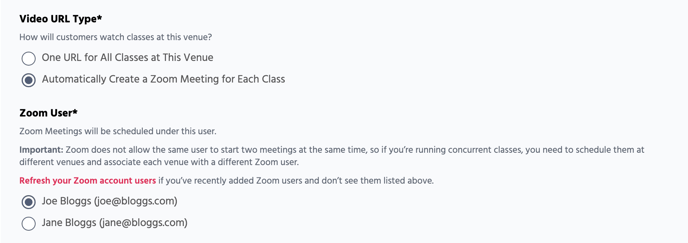
Then select 'Automatically create a Zoom meeting for each class'* for "Video URL Type" and then select which Zoom user you want meetings to be scheduled under.
*Zoom creates a unique Join URL for each new meeting by default, so if you're using the default settings you'll need to select 'Automatically create a Zoom meeting for each class' as seen in the screenshot below.
Need to use the same URL for all of your meetings? See this guide. If using the same URL, please select 'Video URL Type - One URL for all classes at this venue'.
Important! It's not possible for the same Zoom user to host multiple classes at the same time, at the same venue. If you're planning on streaming several different classes at once, please see this guide.
3. Schedule your classes at the online venue
Once you've created the online venue, you'll be able to assign your online venue/s to your online classes. If you already had the online venue assigned to your online classes, you can skip this step.
If not, head to Classes >> Class types >> click desired class >> click the cogwheel button next to a time slot >> 'Edit Details' >> assign the online venue.
If you need to add a brand new online class type check out this guide.
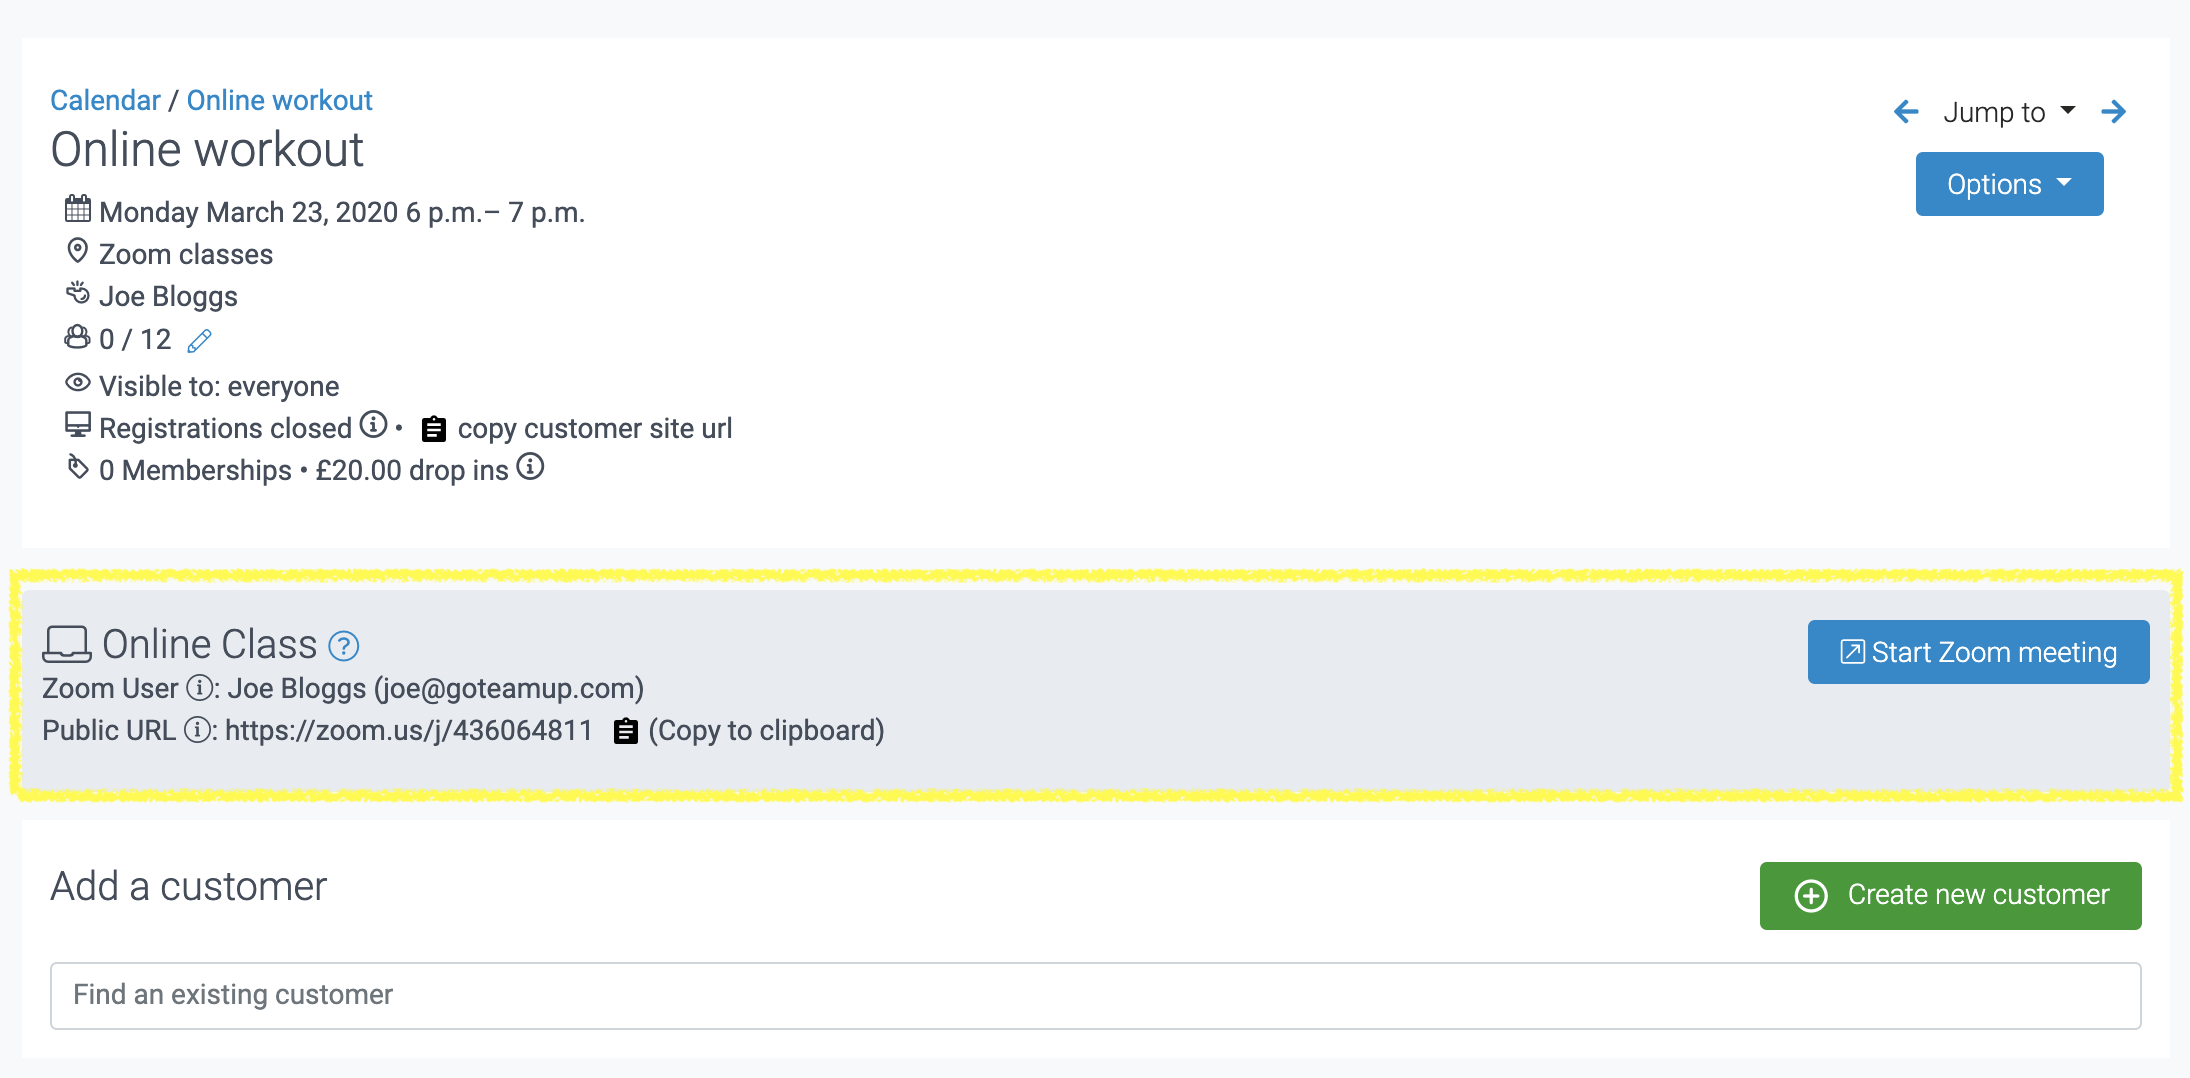
All classes will automatically have a Zoom meeting created for them. You'll be able to view this from the class detail page (Calendar >> click class).
Here, you'll see a section showing the Zoom meeting's public URL* as well as a button to start the meeting.
*Note: Each class has a public URL (only you can view it from the business side). If you need to invite someone that hasn't registered for class, you can send them this URL. Customers who register via this link will not show in the TeamUp attendee list.
On your Customer Site, customers will see a similar banner with a button for them to open the video stream.
For more details about the customer journey, please see How do customers register for online classes.
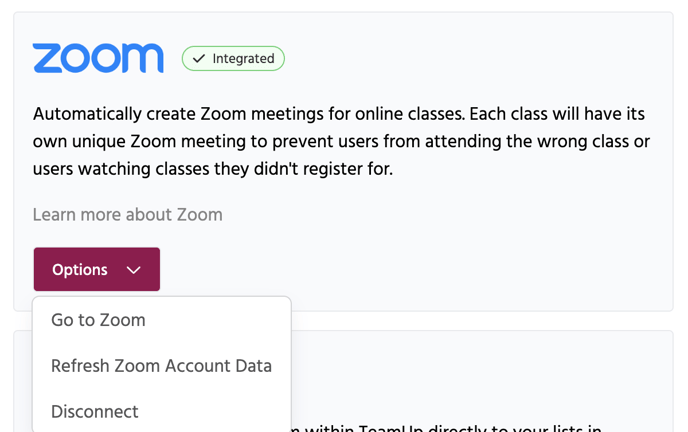
Disconnecting your Zoom account
If you'd like to disconnect your Zoom account from your TeamUp account, simply head to the Integrations page on your Business Dashboard (Settings >> Integrations).
Once there, click on 'Options' within the Zoom section and then select 'Disconnect'. On the following screen, confirm you'd like to disconnect your Zoom account by clicking 'Disconnect'.
Uninstalling the TeamUp App from your Zoom account
First, log into your Zoom Account and navigate to the Zoom App Marketplace.
Click Manage > Installed Apps or search for the TeamUp app.
Click the TeamUp app.
Click Uninstall.
Jump to
An Overview of On Demand Content
Recommended resources
Taking your fitness classes online
Did this answer your question?